Obtaining Wildkatze
NOTE: The release file does not contain vtk folder data. The current GUI works without vtk too.
OpenMPI 1.10 Version
Download Wildkatze 2025.9.30 (Sept 2025)
OpenMPI 4.14 Version Download Wildkatze 2025.8.30 (Aug 2025)
GPU Release : wildkatze.gpu.2023.6.30 too.
Download Wildkatze 2023.6.30 (June 2023)
DSI Wildkatze
NOTE: The release file does not contain vtk folder data. The current GUI works without vtk too.
Download Wildkatze 2023.11.30 (November 2023)
On Youtube
Watch it on Youtube Video
Installation
Step 1 – Basic Set Up
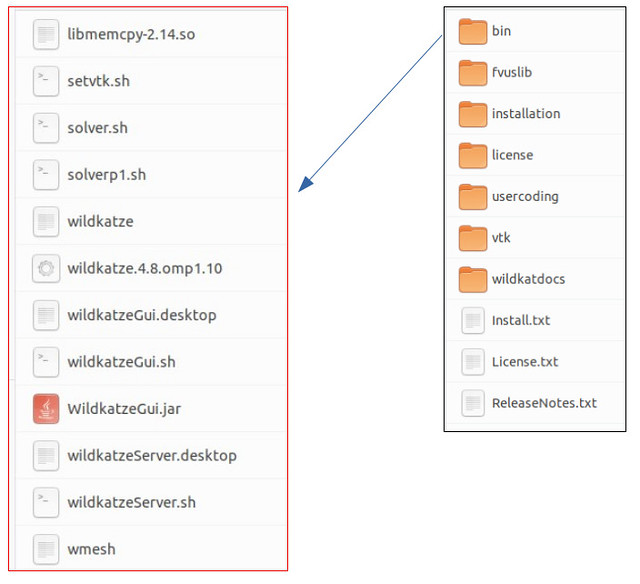
Unzipping Wildkatze.Release.2023.6.30.x86_64.7z we get:

- Make directory called dravvya in home ($HOME) directory.
- Copy the contents of Wildkatze.Release.2023.5.30.x86_64.7z in
$HOME/dravvyafolder. - Copy the license file license.wildkatze.dat in the
$HOME/dravvya/licensefolder. This license file shall be provided by Digital Solution Inc. The license file provided with basic setup will not be identified by the solver. - At this point
$HOME/dravvyafolder has all relevant files along with a valid license.
Step 2 – Installing Openmpi
Wildkatze uses Openmpi, a typical setup shall go as follows:
sudo apt-get install libibnetdisc-dev
wget http://www.open-mpi.org/software/ompi/v1.10/downloads/openmpi-1.10.3.tar.gz
tar -xvzf openmpi-1.10.3.tar.gz
cd openmpi-1.10.3
./configure --prefix=$HOME/dravvya/openmpi110
make && sudo make install
Step 3 – VTK for Client GUI
Setting up VTK is no longer necessary because VTK Panels in GUI are no longer loaded.
We copied solver into $HOME/dravvya/

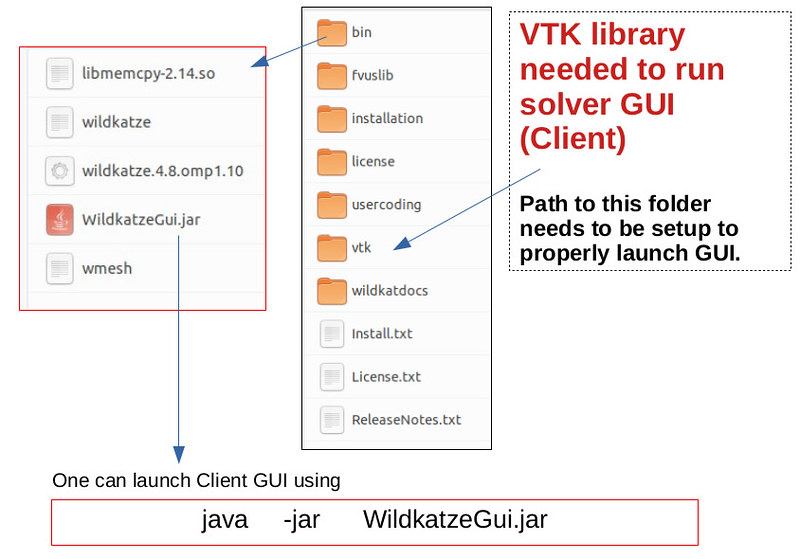
However this would mostly likely fail to launch the GUI for failing to load vtk
related classes.
To properly start GUI one need to set environment variable LD_LIBRARY_PATH to $HOME/dravvya/vtk

One can now launch Client GUI using

Java
In case the GUI fails to load for absence of Java, one can install Java with following:
sudo apt-get install default-jdk
sudo apt-get install default-jre
sudo apt install openjdk-8-jdk
Step 4 – Solver Launch Scripts
We copied solver into $HOME/dravvya/

There is a set of .sh or shell script files present in bin folder. After copying files to $HOME/dravvya they shall be present in $HOME/dravvya .
These files are used to run the solver in various modes.
Creating solver.sh file for launchig wildkatze solver
Please edit the .sh files present in bin folder (int installation) with proper $HOME values.
Example solver.sh to launch wildkatze with 4 processes
/home/savya/dravvya/openmpi110/bin/mpirun -np 4 /home/savya/dravvya/bin/wildkatze -l /home/savya/dravvya/license/license.wildkatze.dat "$@"
We now set up the GUI script.
GUI script wildkatzeGUI.sh
One shall replace the $HOME variable in wildkatzeGUI.sh. This script is used to launch the GUI.
Step 5 – Running the Solver
Solver in Console Mode
Once the solver.sh script is set up, starting solver in console mode is:
source solver.sh
This launches the solver in console mode:

Solver in Client Server Mode (with GUI)
To start the server at port 5010 we use
solver.sh -s 5010

One can notice 5010 in above picture. This is the port on which server is listening for incoming connections from
GUI.
Now user shall start GUI and connect the server on this port.
Client Mode
To start GUI or client
solverGui.sh
This runs GUI as


